
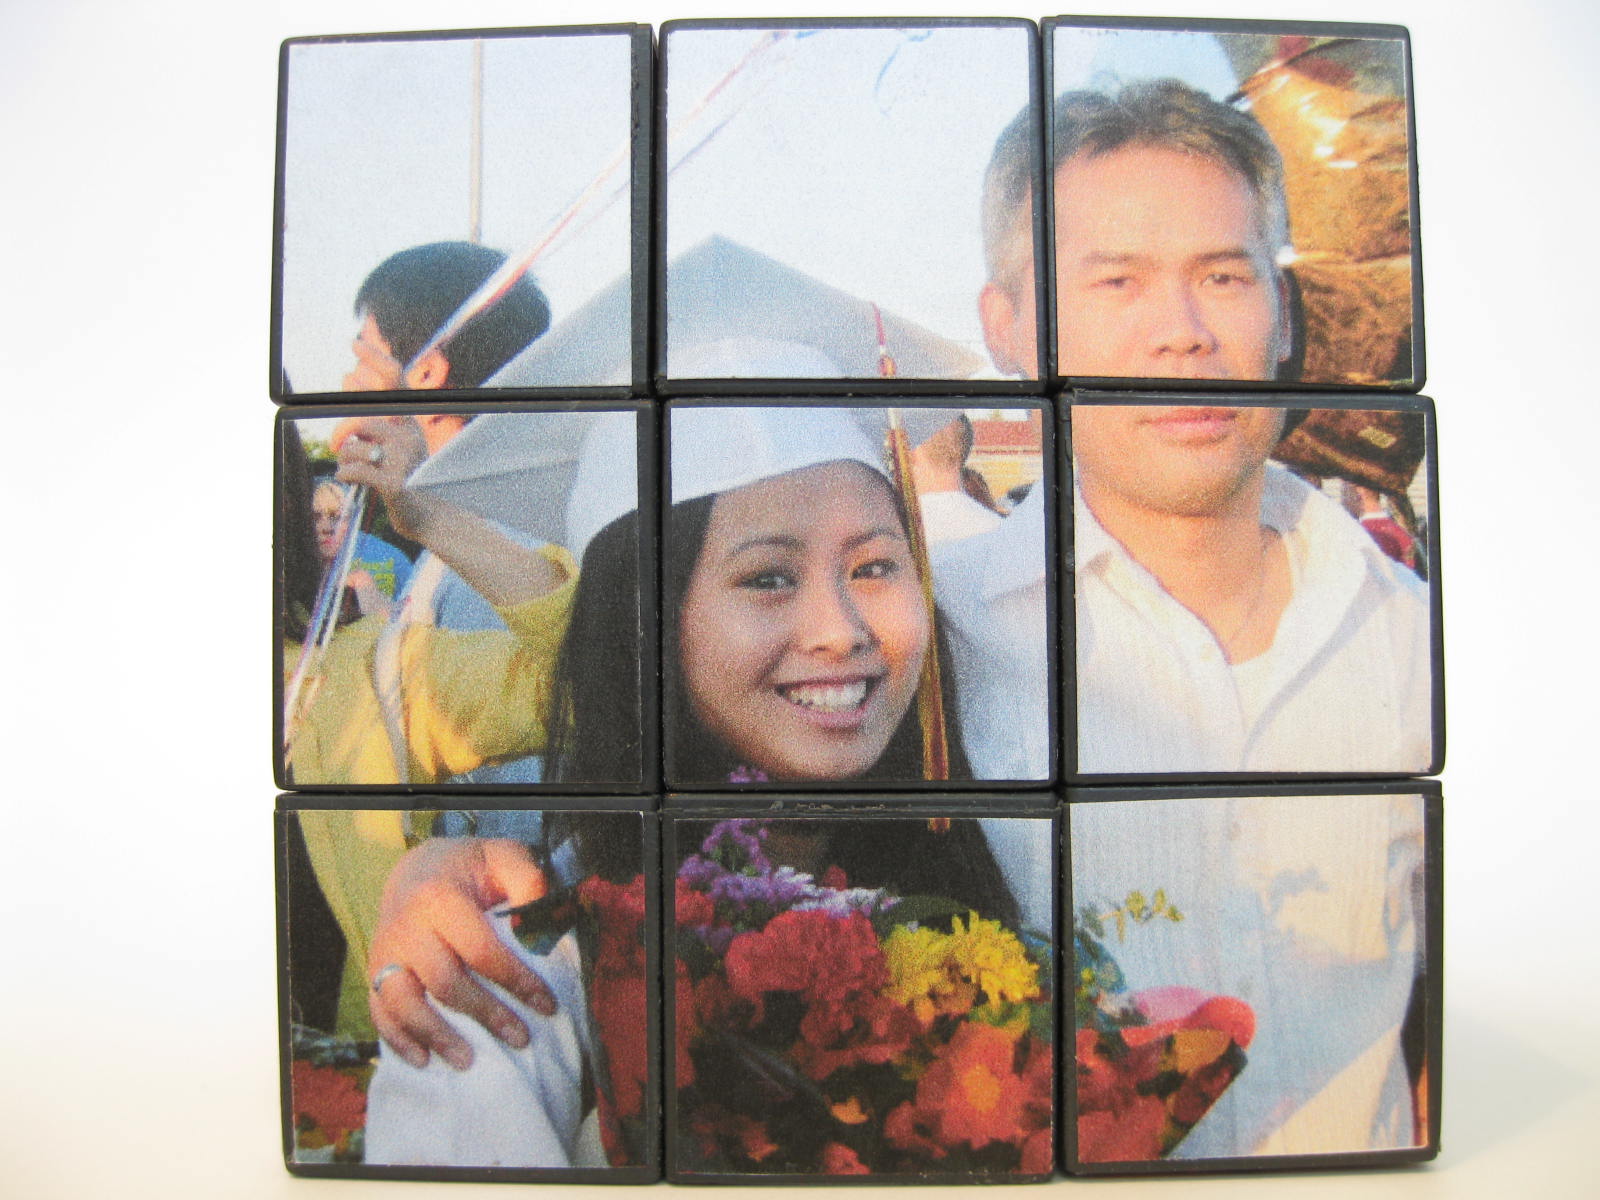
So for Father's Day, I kept asking my dad what he wanted but he said kept saying he already "has everything he wants and needs." I got him a bottle of cologne at first but my mom begged me not to give him yet another bottle of cologne (he has about 3 in the bathroom cabinet waiting to be used!) So for those who need to give a non-beauty related gift to anyone who "has everything," how about a personalized photo Rubik's Cube? I looked online for "personalized photo Rubik's Cubes" but they were all really expensive for something as simple as sticking pictures on a cube.
What you'll need:
1. Rubik's cube
2. Printed photos
3. Ruler
4. Sticker backings (for pictures)/ Sticker machine
5. Pen/ Pencil
6. Scissors
Directions:

1. Get your Rubik's Cube.

2. Peel off all the stickers.

3. Print your photos in the size of your Rubik's cube. My entire cube was about 2.8 inches on each side so I printed each picture 2.5 inches instead since you have to subtract a little bit off because of the spacing between each square. The spacing will "add" to the size of your picture.

4. Draw your lines on the back of each picture. Here I drew them on the front but it caused the pen to smear on the picture a bit -plus there were black lines showing. Afterwards, I use a pen to draw the lines on the back side of every picture. The pen was dark enough to show through so I knew where to cut (it showed through the sticker backing too.)

5. Here's a picture of the "guide" I used. I printed the cube off the computer to the size of my cube.

6. Slide your pictures through a "sticker machine." If you don't have one, you can use sticker backings.

7. We have stickers!

8. Cut over the lines your drew on the back of each picture. I did one picture at a time so that I didn't mix up all the squares.

9. Stick on the stickers. Repeat to each side.
Each Side..

Side 1

Side 2

Side 3
Side 4

Side 5

Side 6
Extra Tip..

I put the Cube in a Sephora Box to let him think I was actually giving him another "beauty gift." He was really surprised!
Enjoy!
*Please do not use any pictures from this post as it does contain images of my younger brother and sister. Please ask for permission before using any of my pics. If you'd like to use a photo, please post the link to the blog post containing the picture instead of copying and pasting the picture. I'm sure ya'll understand. Thanks! =)


Aww, this is so sweet! What a creative idea! Will have to try this out sometime :D
ReplyDeleteThanks =) Hope you do.. I want to make one for myself now!
ReplyDeletebrilliant idea!
ReplyDeletei was wandering what to give to my fiancee, he took me away for a week in the mountains and then proposed...
i will use some of the pictures we took there and do this for him.
he loves puzzles.
thank you so much for this idea!!
Thanks. =) I'm glad this helped. And congratulations on your engagement!!
ReplyDeleteWhat photo should I use? The one on a photo paper or the one in an ordinary bondpaper? Thanks.
ReplyDeleteThanks for sharing the post.. parents are worlds best person in each lives of individual..they need or must succeed to sustain needs of the family. paper box
ReplyDelete